My name is Mark Andrade, and I’m an English Professor in the Faculty of Liberal Arts & Sciences and Innovative Learning. I first started using Panopto during the Spring 2019 semester when I was teaching a hybrid course focused on workplace writing skills. Since then, I have created almost 90 videos and integrated many of them into my courses.
Short Weekly Online Video Instructions
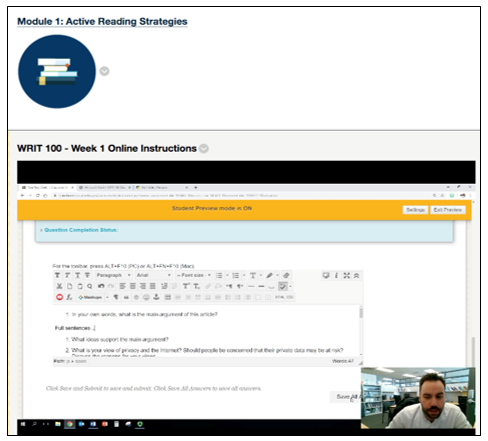
Panopto’s ability to create a quick “screencast” video of our Blackboard course really benefitted my students. I used this screencast feature to provide students with short weekly online instructions. These short 2-3 minute videos pointed students to relevant reading materials, weekly online discussion posts, and online quizzes. Not only did these videos help students stay focused on weekly tasks while learning to use Blackboard more effectively, but it also cut down on emails from students wondering what we covered or where they could find the online material. The time I saved responding to student emails was now being channelled into my next Panopto video.
Screenshot 1: Integrating Weekly Online Instructions into the Learning Materials Section of Blackboard
PowerPoint Videos for Longer Lessons
Although most of my Panopto videos tend to be shorter and more focused, I have also used Panopto for longer video lessons using PowerPoint. At Humber, our courses often contain more challenging concepts that require students to spend added time learning these new skills and content. I found Panopto very useful for creating supplementary online lessons using PowerPoint.
For example, I recorded a number of longer online grammar videos focusing on concepts that students often found challenging. These Panopto grammar videos were accompanied by online quizzes that helped students apply what they learned in the videos. I haven’t used Panopto’s quiz function yet, but I will be exploring this tool in the future.
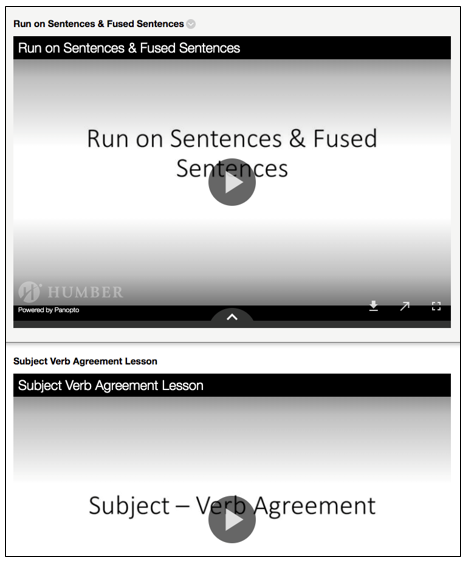
Screenshots 2 and 3 show a few examples of some of these grammar lessons. I didn’t include a capture of my face for these particular videos so that students would focus more on my voice and the grammar concepts. These longer videos ranged in time from 6 minutes to 18 minutes.
Screenshot 1: I used the “Preview image” option to give my grammar videos a more “polished” thumbnail picture; by changing the preview image, students were able to easily understand what the video would cover. To do this, I took a screenshot of the PowerPoint presentation title page and uploaded it by clicking on the “Edit” button and browsing my computer for the image. After saving the changes, my video now had a new, more polished look. You can get creative and create really strong preview images for your videos!

Screenshot 2: By changing the “Preview image” on these videos, students could easily find the online lessons that corresponded with their online Blackboard quizzes.
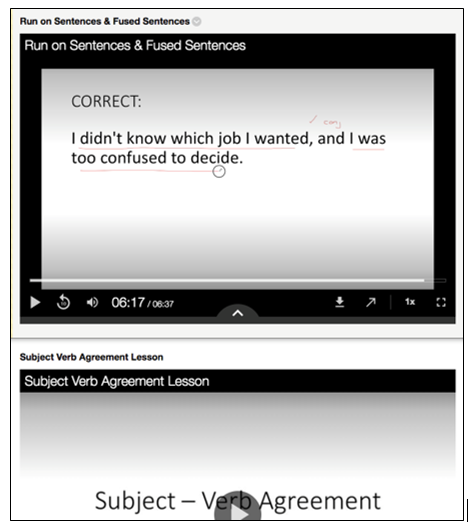
Screenshot 3: In the Screenshot 3, you will notice that I used the pen option to write directly on the PowerPoint lesson. I thought this was a great way to get students to focus on key areas of my lesson.
Panopto’s Editing Tool
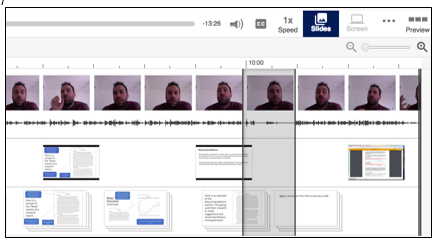
I really like Panopto’s editing tool function for editing unwanted parts from my videos. In Screenshot 4, you’ll notice the grey area I cut from my video, starting around the 10-minute mark. During my 15-minute Powerpoint lesson, I made a mistake while explaining a key course concept. The pressure of ‘not making a mistake’ loomed over my first few Panopto videos; However, I quickly learned that I didn’t have to start a video again, but I could pause for 10 seconds and redo the section. The audio pause made it a lot easier to go into the editing tool and find the area that needed to be cut. You will notice the audio ‘flat-lines’ where I made my mistake. Now, I use this ‘pause’ technique, along with Panopto’s easy-to-use editing tool to ensure my videos are concise, clear, and correct!
Screenshot 4: Editing Screen
If you have any questions, feel free to reach out to Humber’s Panopto Support team.